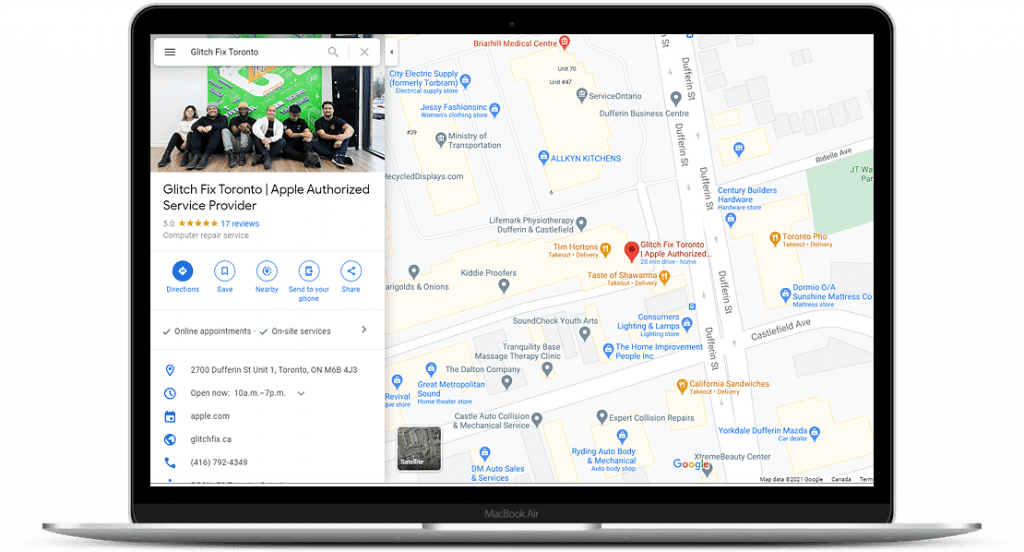
Step 1: Find Your Business on Google Maps
- Open Google Maps (not Google Search) and locate the search bar at the top left.
- Type your business name in the search bar. If your business has multiple locations, include the address or city for accuracy, then press Enter.
- Once your business appears, verify that the name and address match the correct location.
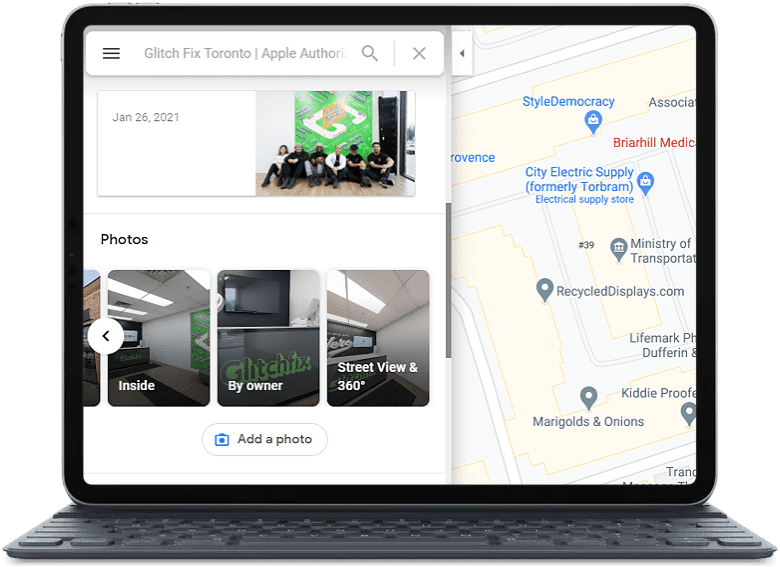
Step 2: Locate “Street View & 360” in Photos
2. Wait until you see the “Photos & Videos” section
3. Click the Right Arrow until you see “Street View & 360”
4. Click on that Image Icon
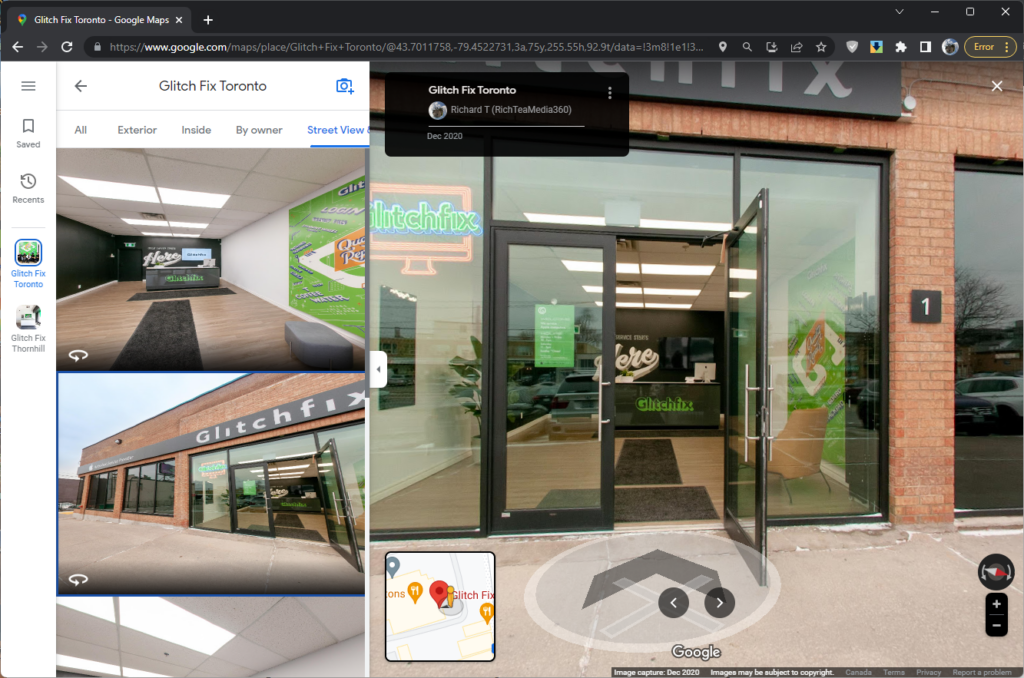
Step 3: Choose Your Desired Starting Point
1) Keep scrolling down till you find a section that you want where your virtual tour to begin.
2) Click on that image on the left-hand side. That image will now appear on the right window.
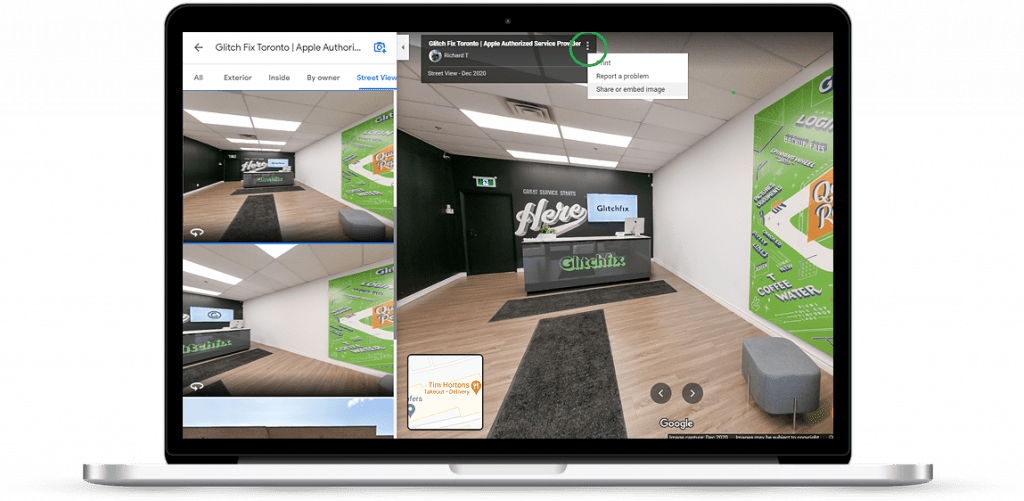
Step 4: Click the ‘three dots’ icon above to locate the embed code.
- At the top-right corner, click on the three vertical dots.
2. In the drop-down menu, select “Share or Embed Image.”
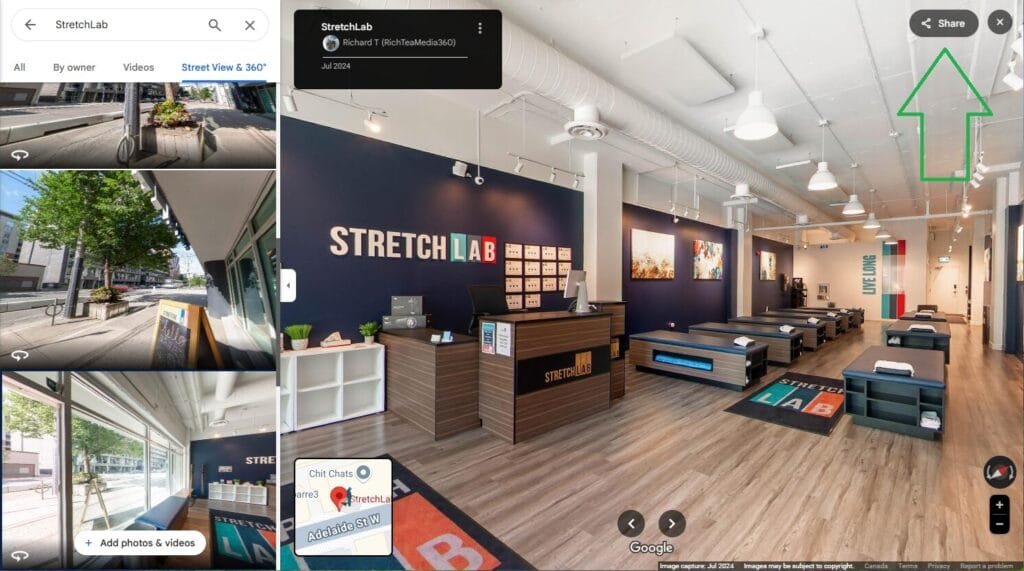
Step 4 (2025 Update): New Share Button Added
We’re still going to keep the “3 dots” step mentioned above because Google does do a lot of testing and sometimes removes features after a while.
Step 5: Select the Dimensions that fits your Website
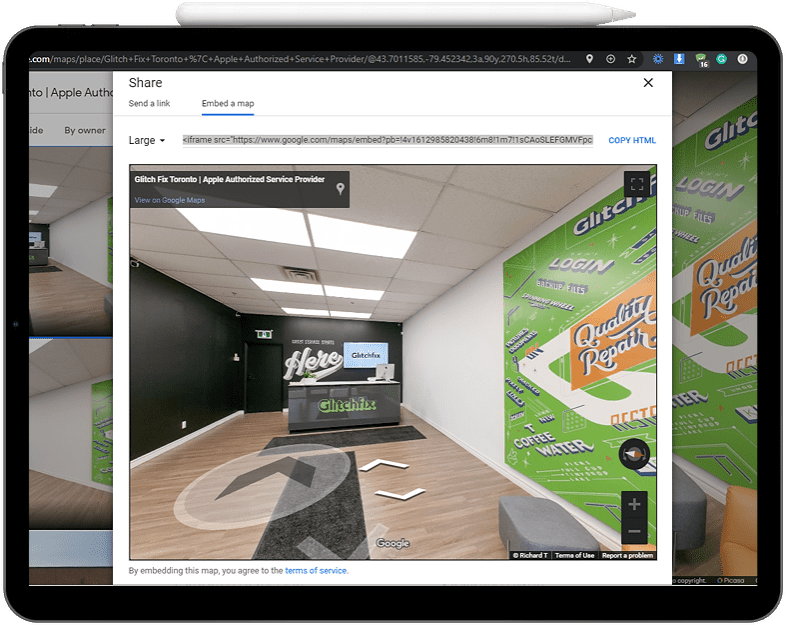
1. Open the Share Window: When the share window appears, select the “Embed a Map” option from the sub-menu.
2. Choose Map Size: Select from the four options—Small, Medium, Large, or Custom.
3. Set Custom Dimensions (Optional): If you choose “Custom,” enter your desired dimensions and click “Preview Actual Size” to see how it will look.
4. Copy the Embed Code: Once you’re satisfied with the size, click “Copy HTML” to copy the code.
Step 6: Go To Your Website and Paste (Ctrl/Cmd+V) the Embed Code
- Access Your Website Platform: Log in to your website builder (e.g., WordPress, Wix, Shopify).
- Select the Page for Your Virtual Tour: Common choices include the Homepage, Location Page, or About Us Page.
- Choose the Section for Embedding: Locate the specific area on the page where you’d like the 360° tour to appear.
- Embed the Tour Code: Paste (Ctrl/Cmd + V) the embed code into the page. (Ensure the section allows HTML for proper display).
- Enhance with Additional Text: Optionally, add any context or descriptive text above or below the tour to provide extra information.
Alternative Option: Create a Button That Opens Up in Google Maps
Create a short URL that directs customers directly to your Google Virtual Tour on Google Maps:
- Start from Step 4
- In the same window that’s opened from clicking the 3 dots and selecting “Share or Embed Image”
- Instead of choosing “Embed a Map,” select Send a Link tab that is beside it on the left
- Copy the URL (Copy Link) and now you can attach it various places.
- Such as Linking it to Text on your website. i.e. Take a Look Inside Our Office in 360
- or Create a Button for visual appeal:
Additonal Tips:
Tip #1: Zoom Out Before Grabbing the Embed Code
- Go to Share → Embed a Map in the window.
- In the bottom right corner, you’ll see a plus and minus button.
- Click the minus button (or scroll down with your mouse wheel) to zoom out slightly.
This small adjustment helps customers view more of your store layout, making it look more spacious—perfect for locations with narrow aisles.
Tip #2: Create a Short URL (Send a Link)
In the same window, instead of choosing “Embed a Map,” select Send a Link to create a short URL that directs customers directly to your Google Virtual Tour on Google Maps.
Consider adding a custom button linked to this URL across various pages of your website. This increases customer interaction with your Virtual Tour. Alternatively, text links are just as effective and can be easily shared on social media, in emails, or on platforms like Discord.
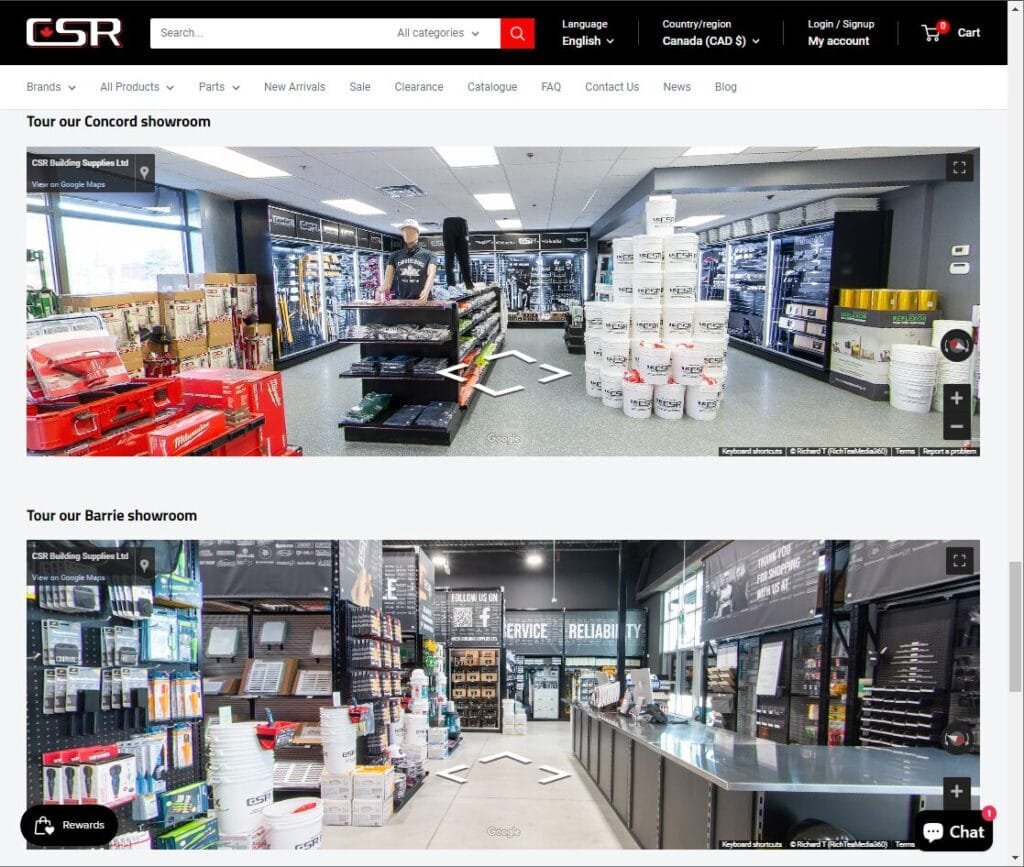
Tip #3: Add Multiple Virtual Tour Windows to Your Website
You’re not limited to just one tour; you can embed multiple tour windows. This is useful if you want to showcase:
- More than one Business
- Different Areas of Your Space (i.e. Lobby, Rooms, Amenities)
- Interior and Exterior Street Views
Tip #4: Purchase an Overlay for Advanced Navigation
If your business operates in a large location—such as a hotel, entertainment center, or resort—navigating the space can be overwhelming for customers. They might struggle to find different floors, areas, or rooms. Implementing an overlay can significantly enhance the user experience by:
- Labeling Each Area: Clearly display labels for various sections of your business.
- Adding a Navigation Menu: Provide an easy-to-use menu for seamless navigation.
- Offering Explanations: Include descriptions and information about different parts of your business.
Recommended Overlay Providers:
Example:
Check out an example from Panowalks: https://panowalks.com/embed/zuqdO0kpN3isnuVDe4IyT4P0SCvL/.
How to Set It Up:
- Consult Your Google Photographer: Often, the photographer who captured your location can assist with setting up the overlay.
- Choose a Provider: Select from recommended providers like TourMkr or Panowalks based on your needs.
- Implement the Overlay: Follow the provider’s instructions to integrate the overlay into your virtual tour.
Cost-Effectiveness:
The annual cost for an overlay typically ranges from $50 to $100. Considering that even one additional customer can cover this expense, it’s a valuable investment for enhancing customer experience and navigation.
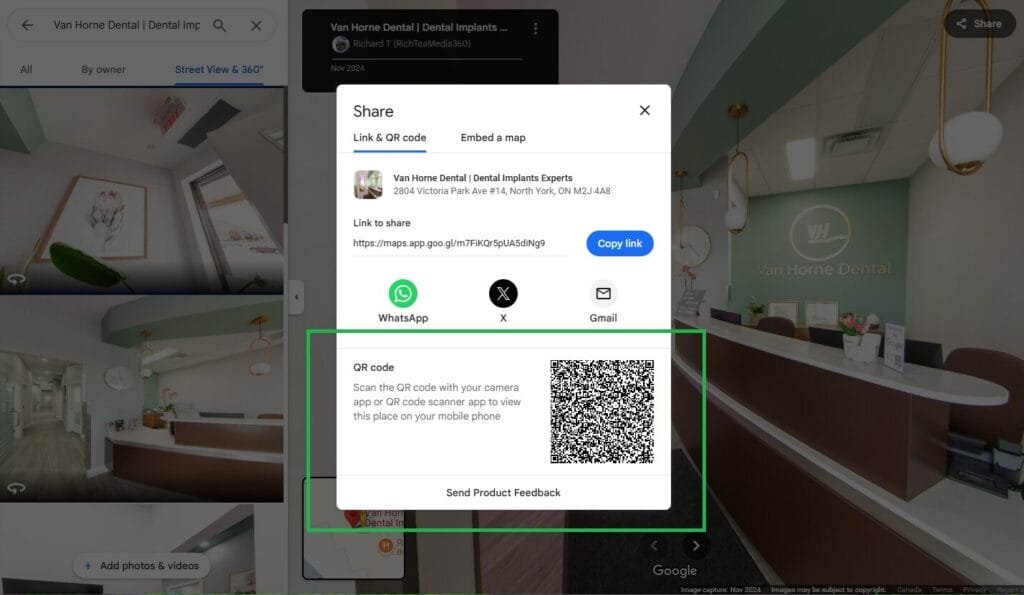
Tip #5 (2025 Update): Create QR Codes to Share
When clicking the Share button, a QR Code will appear on the bottom. The QR Codes can be downloaded and saved as an image. Use them freely on your postcards, flyers, and marketing material!
