How To Embed Your Google Virtual Tour To Your Website
Total Time: 10 minutes
Step 1: Find Your Tour on Google Maps
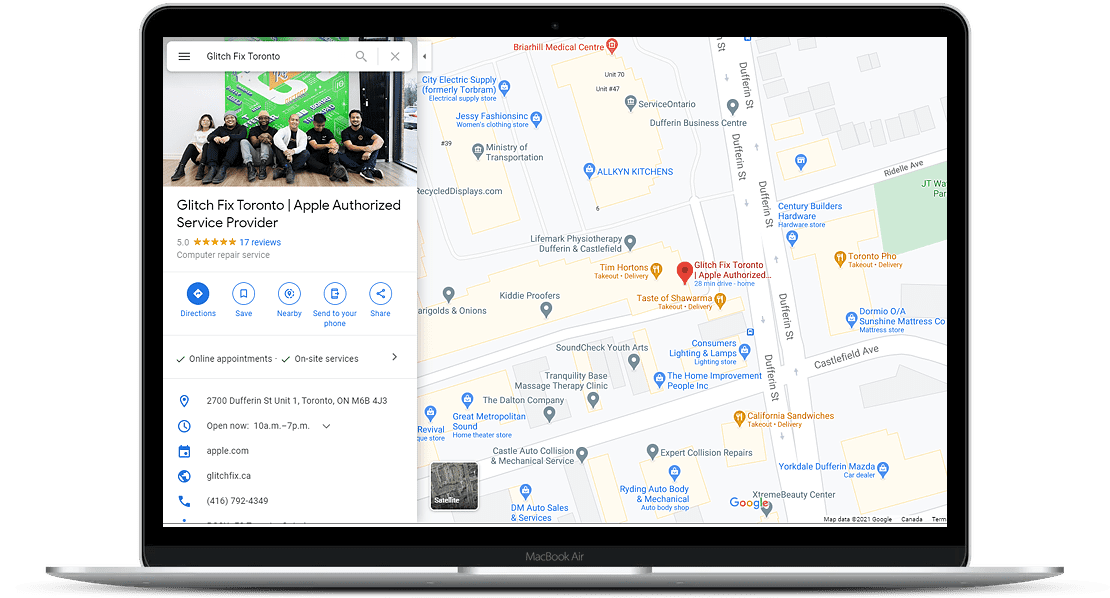
First, search for your business on Google Maps. It MUST be Google Maps, this will not work on Google Search. Locate the search bar on the top left and type in the name of your business. If there is more than one location, add your address or location beside the name. Hit Enter. Once located double check the name and address is the right one you are searching for.
Step 2: Locate “Street View & 360” in Photos
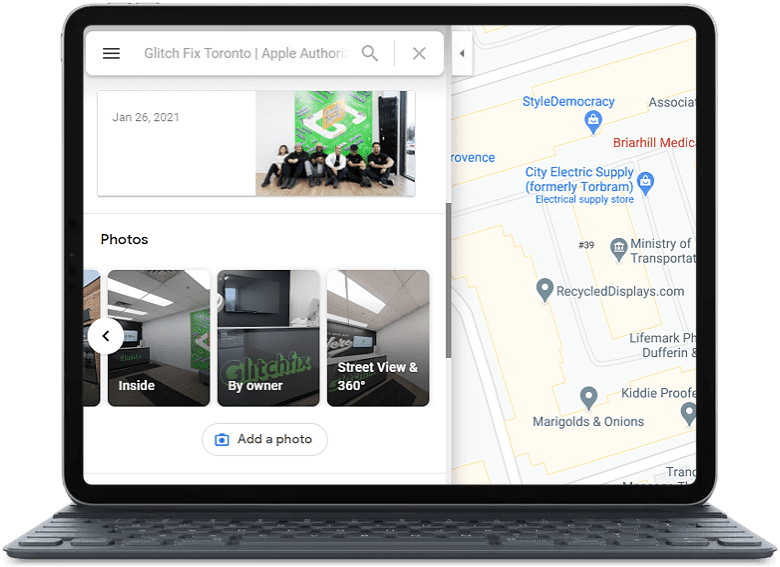
1. Scroll Down on the Left Hand Side of your Google Business Directory
2. Wait until you see the “Photos” section
3. Click the Right Arrow until you see “Street View & 360”
4. Click on that Image Icon
Step 3: Choose Your Desired Starting Point
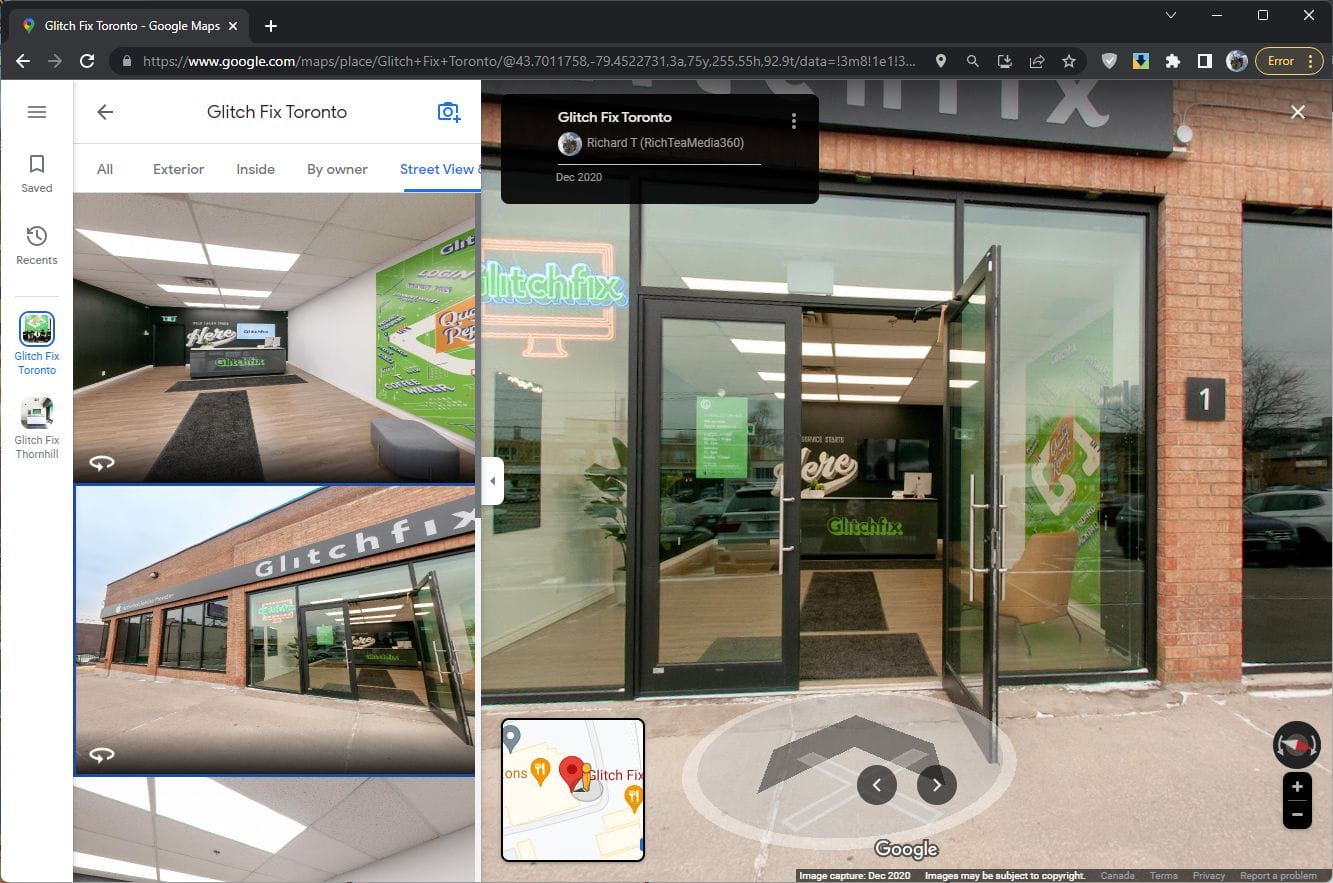
On the left-hand side, you can scroll down and see all the panoramics that are part of your virtual tour. Keep scrolling down till you find a section that you want where your virtual tour to begin. Click on that image on the left-hand side. That image will now appear on the right-hand side.
Step 4: Find the Embed Code by Clicking the 3 Dots
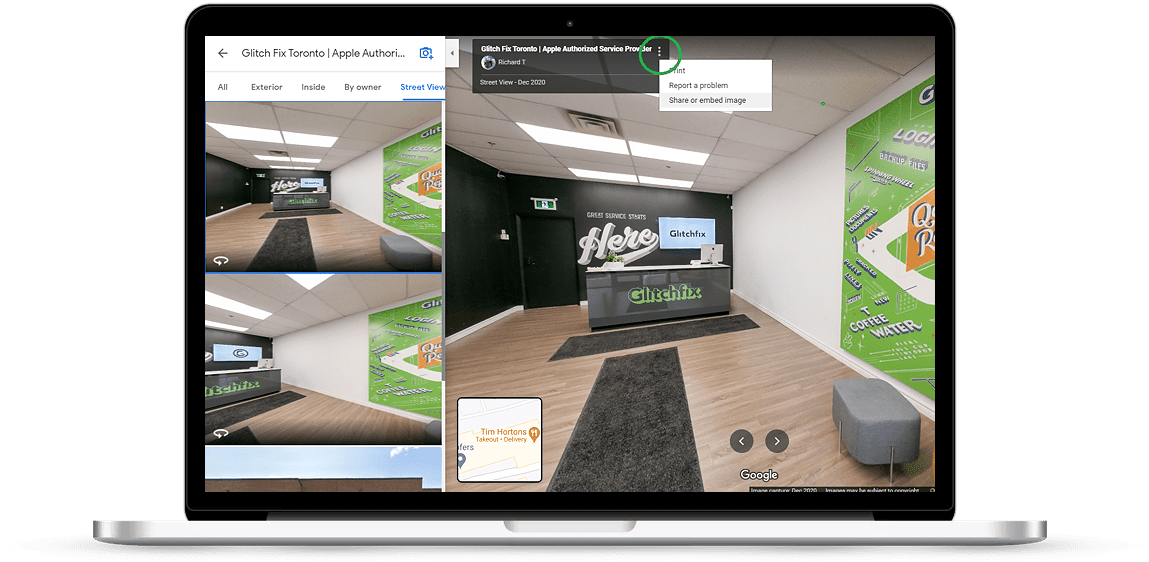
1) On the top part of the right-hand side. You will see 3 vertical dots. Click on It
2) A drop-down menu will appear and choose “Share or Embed Image”
Step 5: Choose the Size that fits your Website
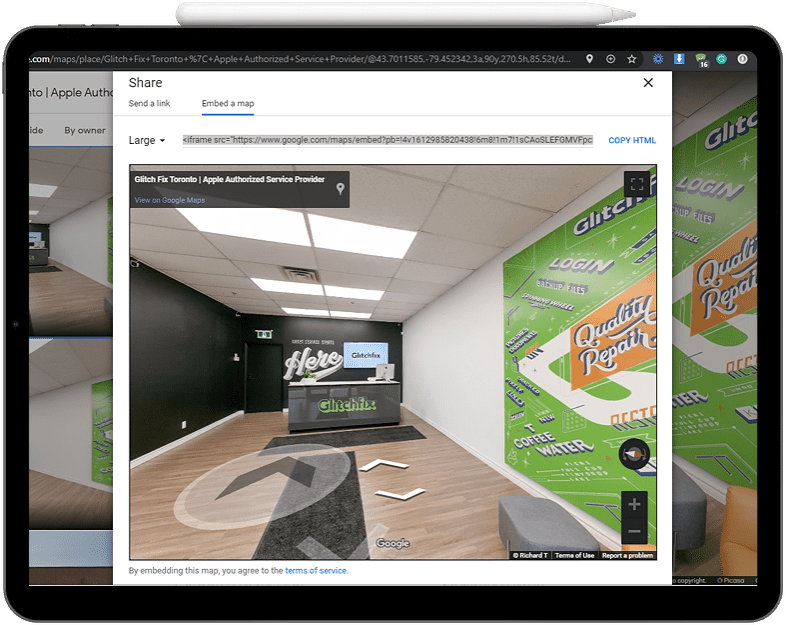
1) When the share window pops up, choose the sub-menu “Embed a Map”
2) Select Your Size. You have 4 options, Small, Medium, Large, or Custom.
3) If you choose Custom you can set your own dimensions and click “Preview Actual Size After”
4) Once you have your size determined click “Copy HTML”
Step 6: Go To Your Website and Paste (Ctrl/Cmd+V) the Embed Code
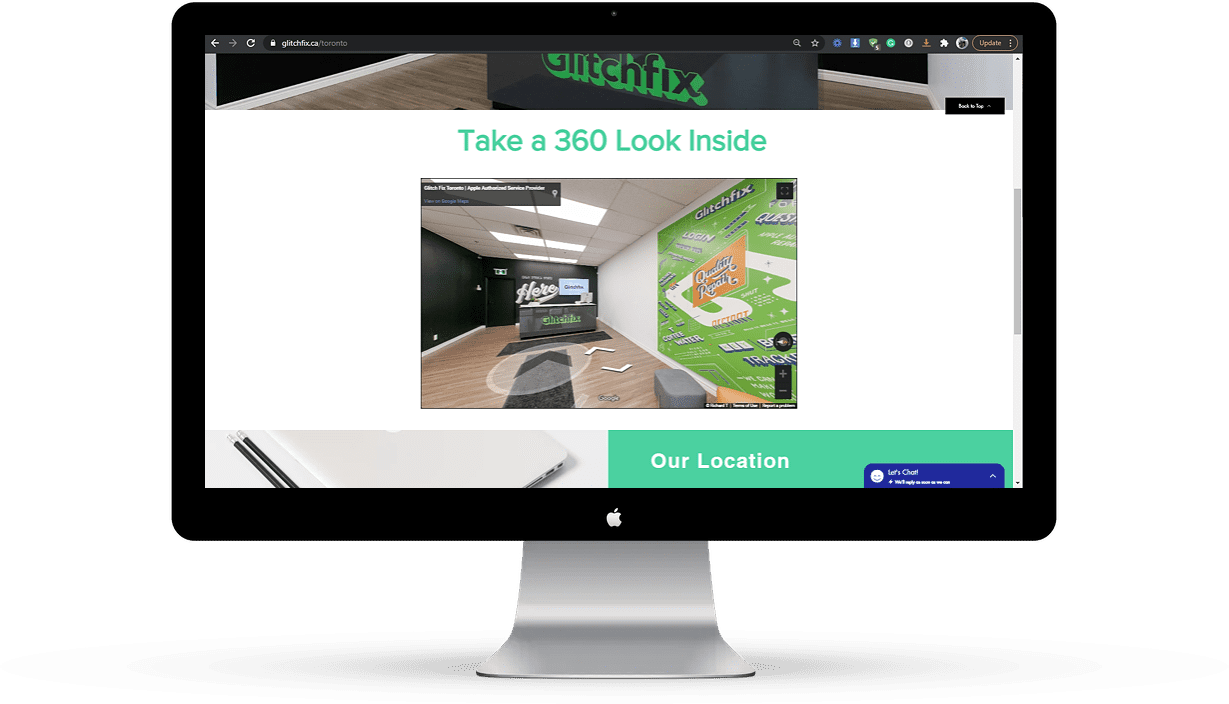
1. Go to your Website Platform (i.e. WordPress, Wix, Shopify, etc…)
2. Find the page you want to add your Virtual Tour. Common choices are the Homepage, Location Page, or About Us Page.
3. Find the section of that page where you want to add the 360 Tour.
4. Paste (Ctrl/Cmd +V) the tour onto the page. [make sure it accepts HTML]
5. Add any additional text above or below.
Tip #1: Zoom Out Before Grabbing the Embed Code
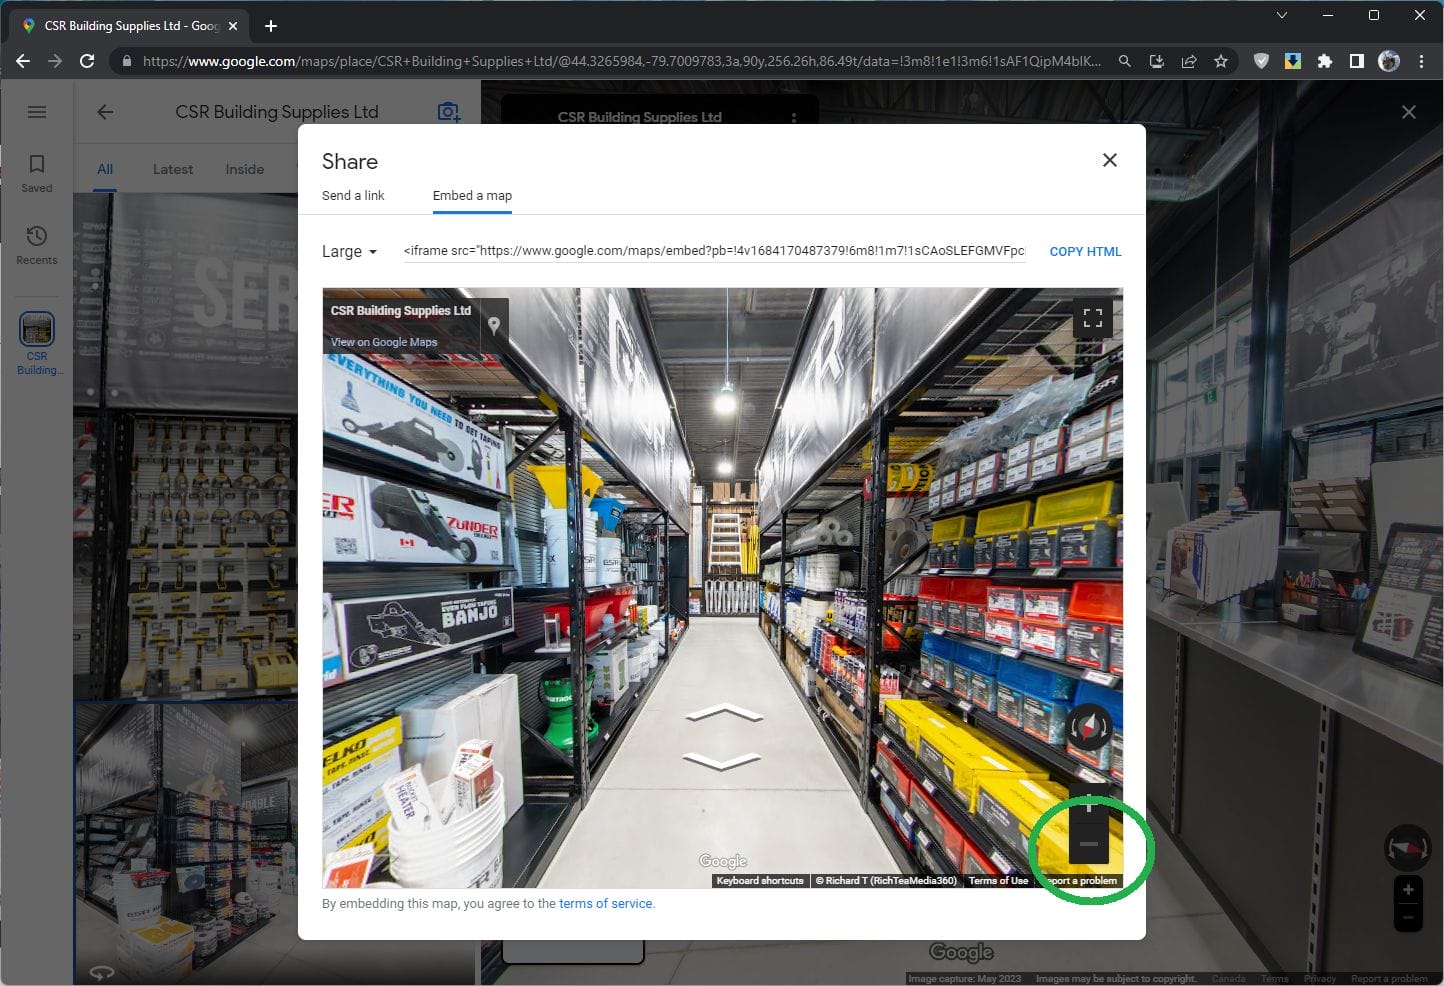
1) In the Share –> Embed a Map, Window.
2) In The bottom Right-hand Corner there is a plus and minus.
3. You can click the minus button (or scroll your mouse wheel down) to zoom out a tad.
This is helpful if you have a store with narrow aisles. It makes your location look a big larger and allows customers to see more when browsing.
Tip #2: Use the Send a Link Feature

In the same window above, instead of “Embed a Map” choose “Send a Link”
The send-a-link window provides a URL that directs customers directly to your Google Virtual Tour right on Google Maps.
You can add your own custom button on various parts of your website. This gives customers more opportunities to interact with your Virtual Tour.
Simply create the button and link the URL from Google Maps to your Button
You also don’t have to create buttons; text works fine as well. With text links, it is easier to add to your social media, emails, or discord.
Tip #3: Add Multiple Virtual Tours on your website
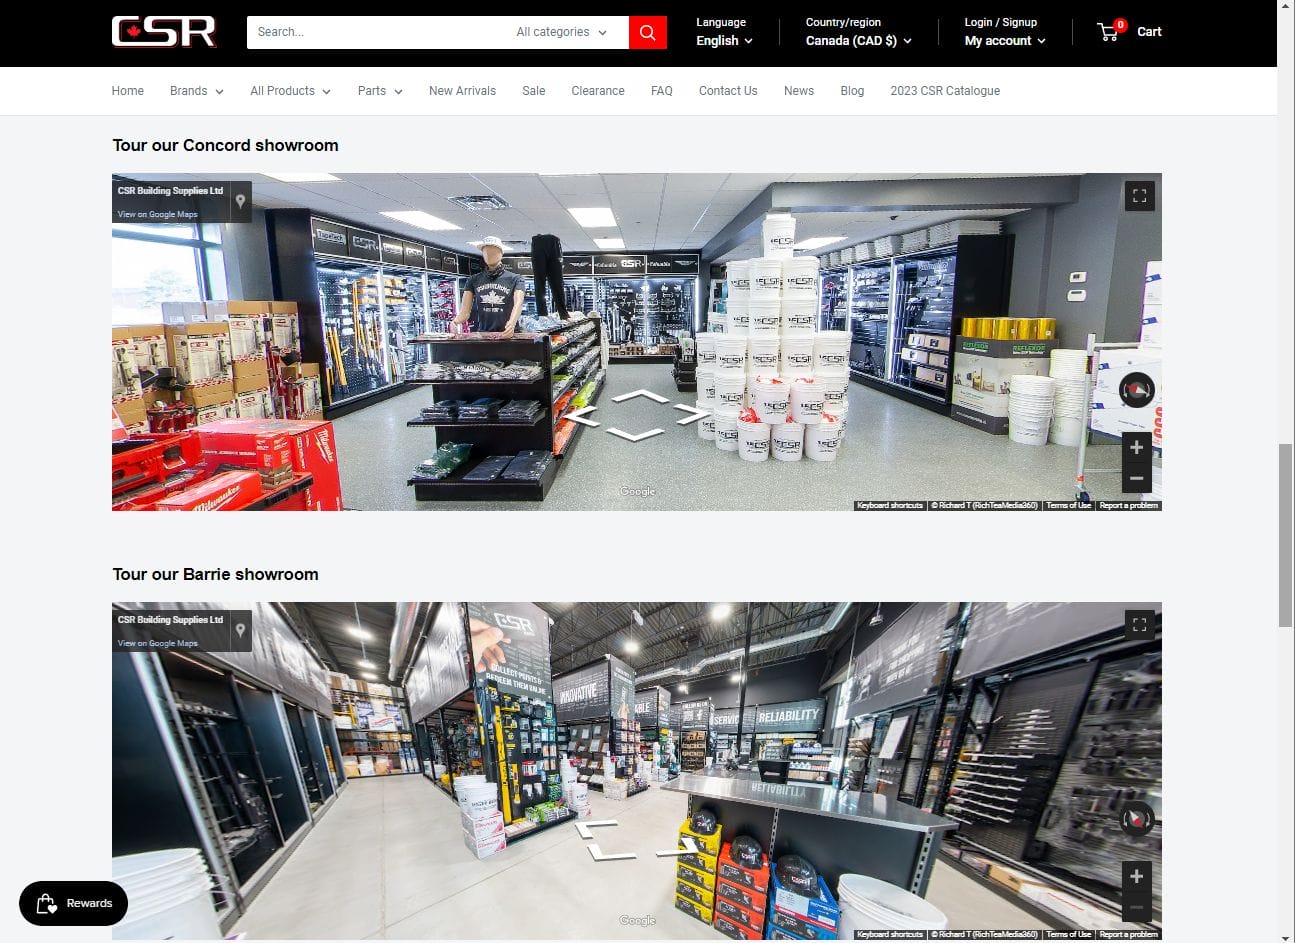
You don’t have to add just 1 tour you can add multiple windows this is good if you want to showcase:
1) Multiple Locations
2) Different Areas of Your Business
3) Interior & Exterior Street View
Tip 4: Purchase an Overlay for Advanced Navigation
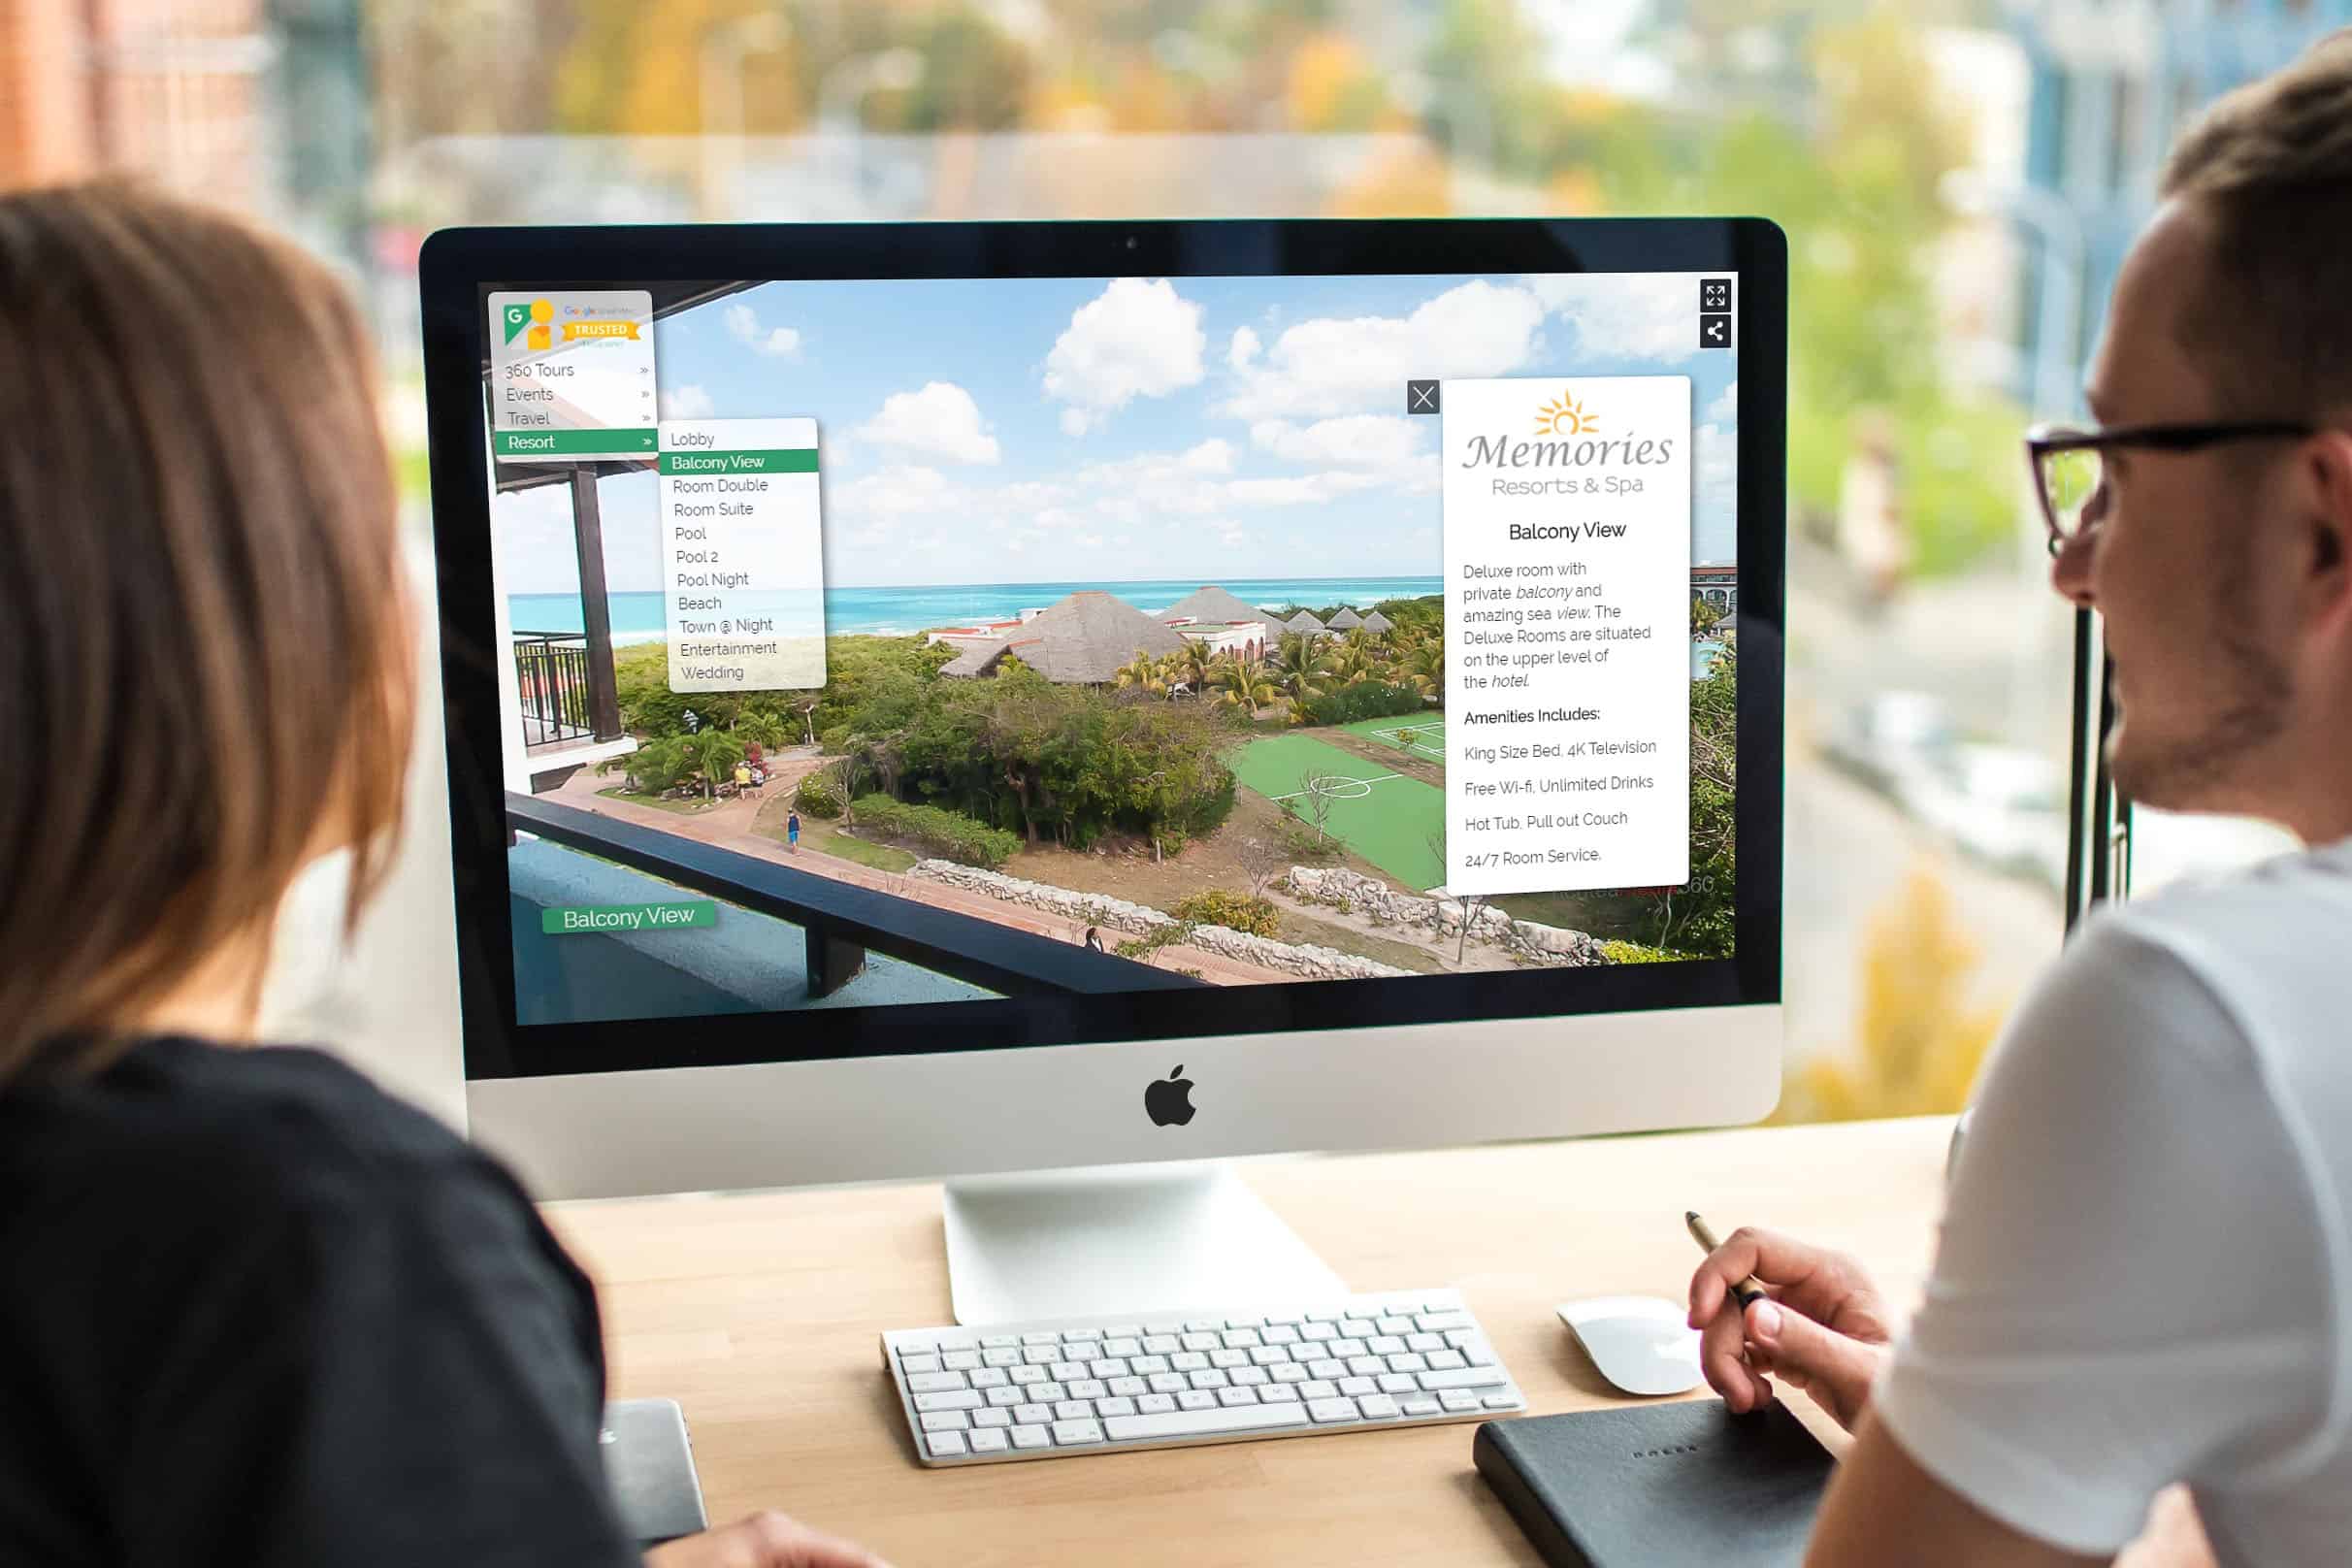
If you have a massive location such as a hotel, entertainment center, or resort it can be quite overwhelming to navigate around. Customers may be confused with different floors, areas, or rooms of your business. Adding an overlay allows customers to see labels for each area of your business. Plus you can add a menu for easier navigation and explanations about your business. Two recommended overlays are from https://tourmkr.com/ and Panowalks.
You can see an example from Panowalks Here: https://panowalks.com/embed/zuqdO0kpN3isnuVDe4IyT4P0SCvL/
Usually, the Google Photographer that photographed your location can help set that up for you. The price ranges from $15-$30 per year. If it can add just one more customer to your business, it pays for itself already.
0 Comments